
Personalize your storefront with a custom logo! Here’s how you can add a store logo to your storefront:
- Log in to your Shopper.com account and hover over your profile picture on the right corner
- From the drop down that appears, select the “Settings” option.
- On the settings page, Tap “Store Basics” and you will now see the “Store Logo” option.
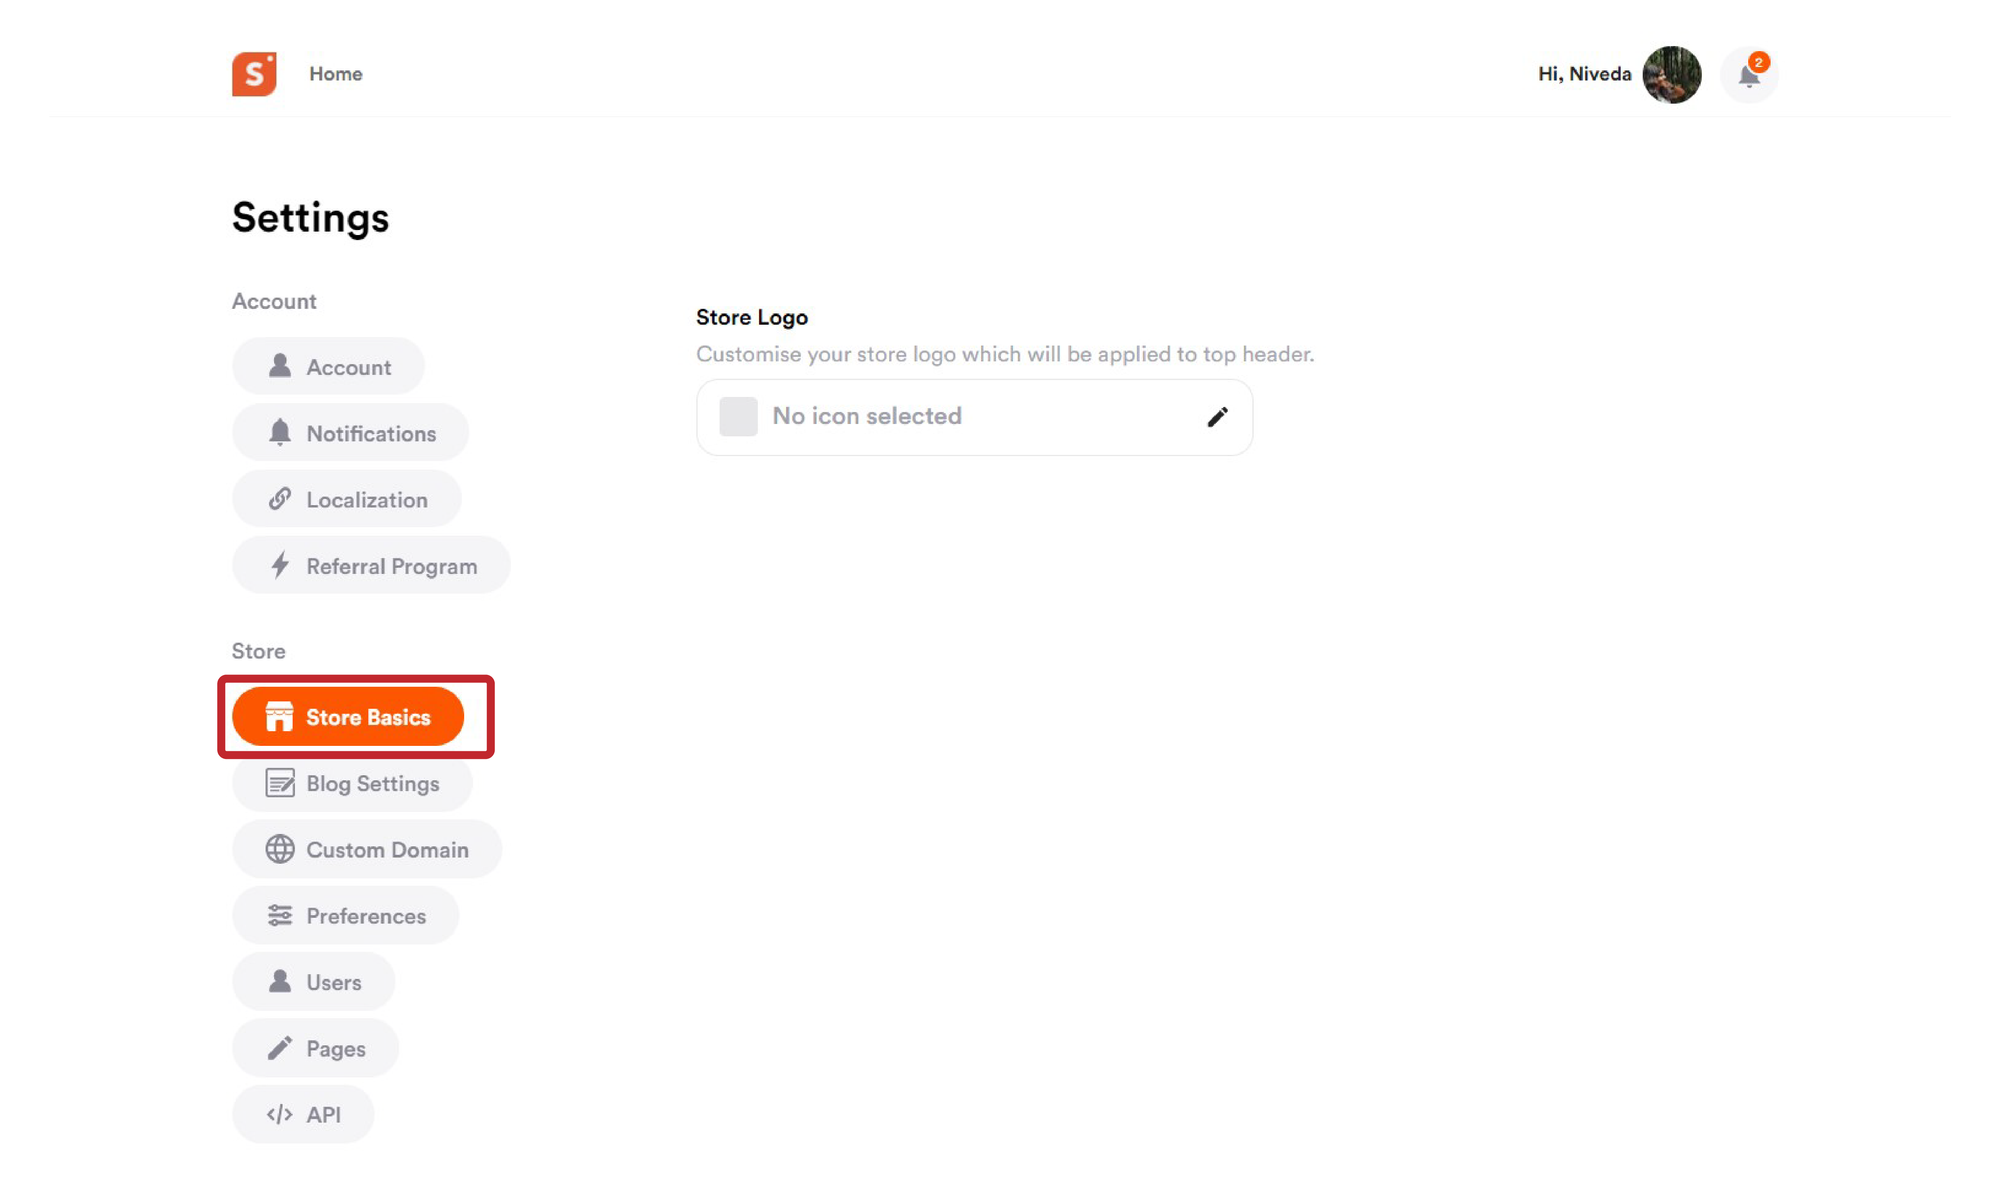
- To add a custom store logo, click on “Upload logo” option.
- On the upload page, select a file from your camera roll, or desktop files.
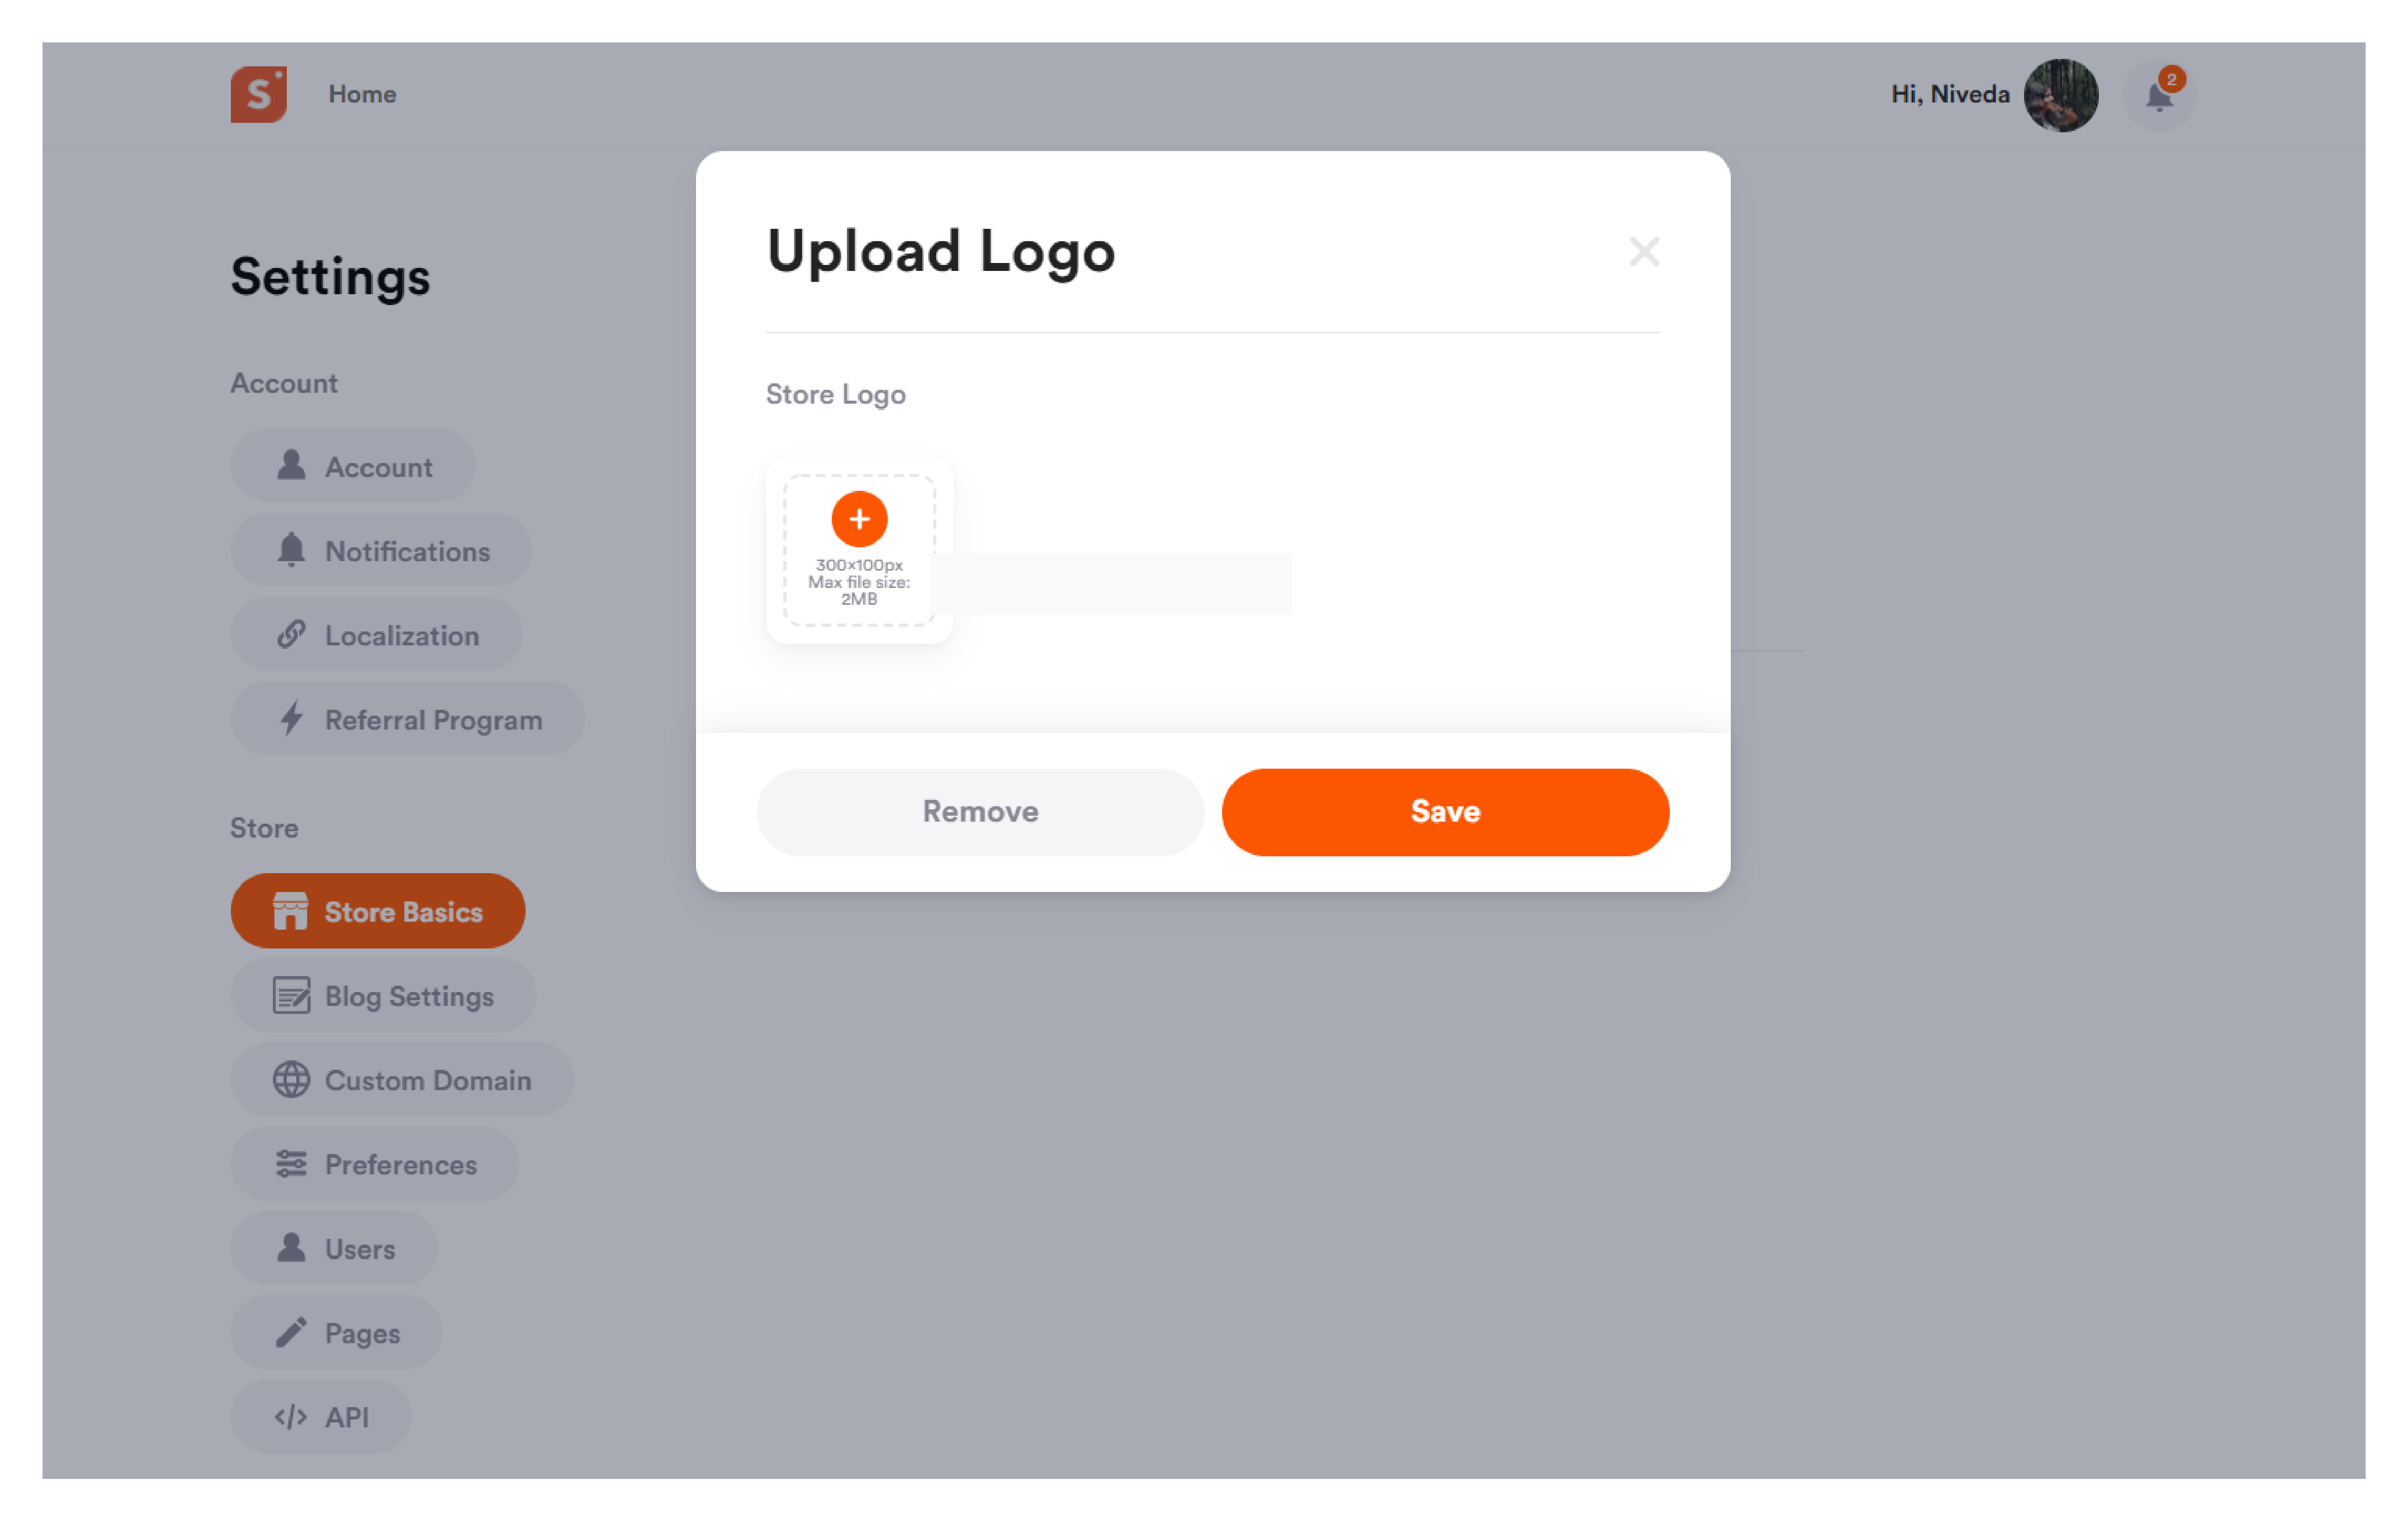
- Please note that the image should be at least 300x100 px with a maximum file size of 2MB.
- After adding the image, click on save to update your store logo.
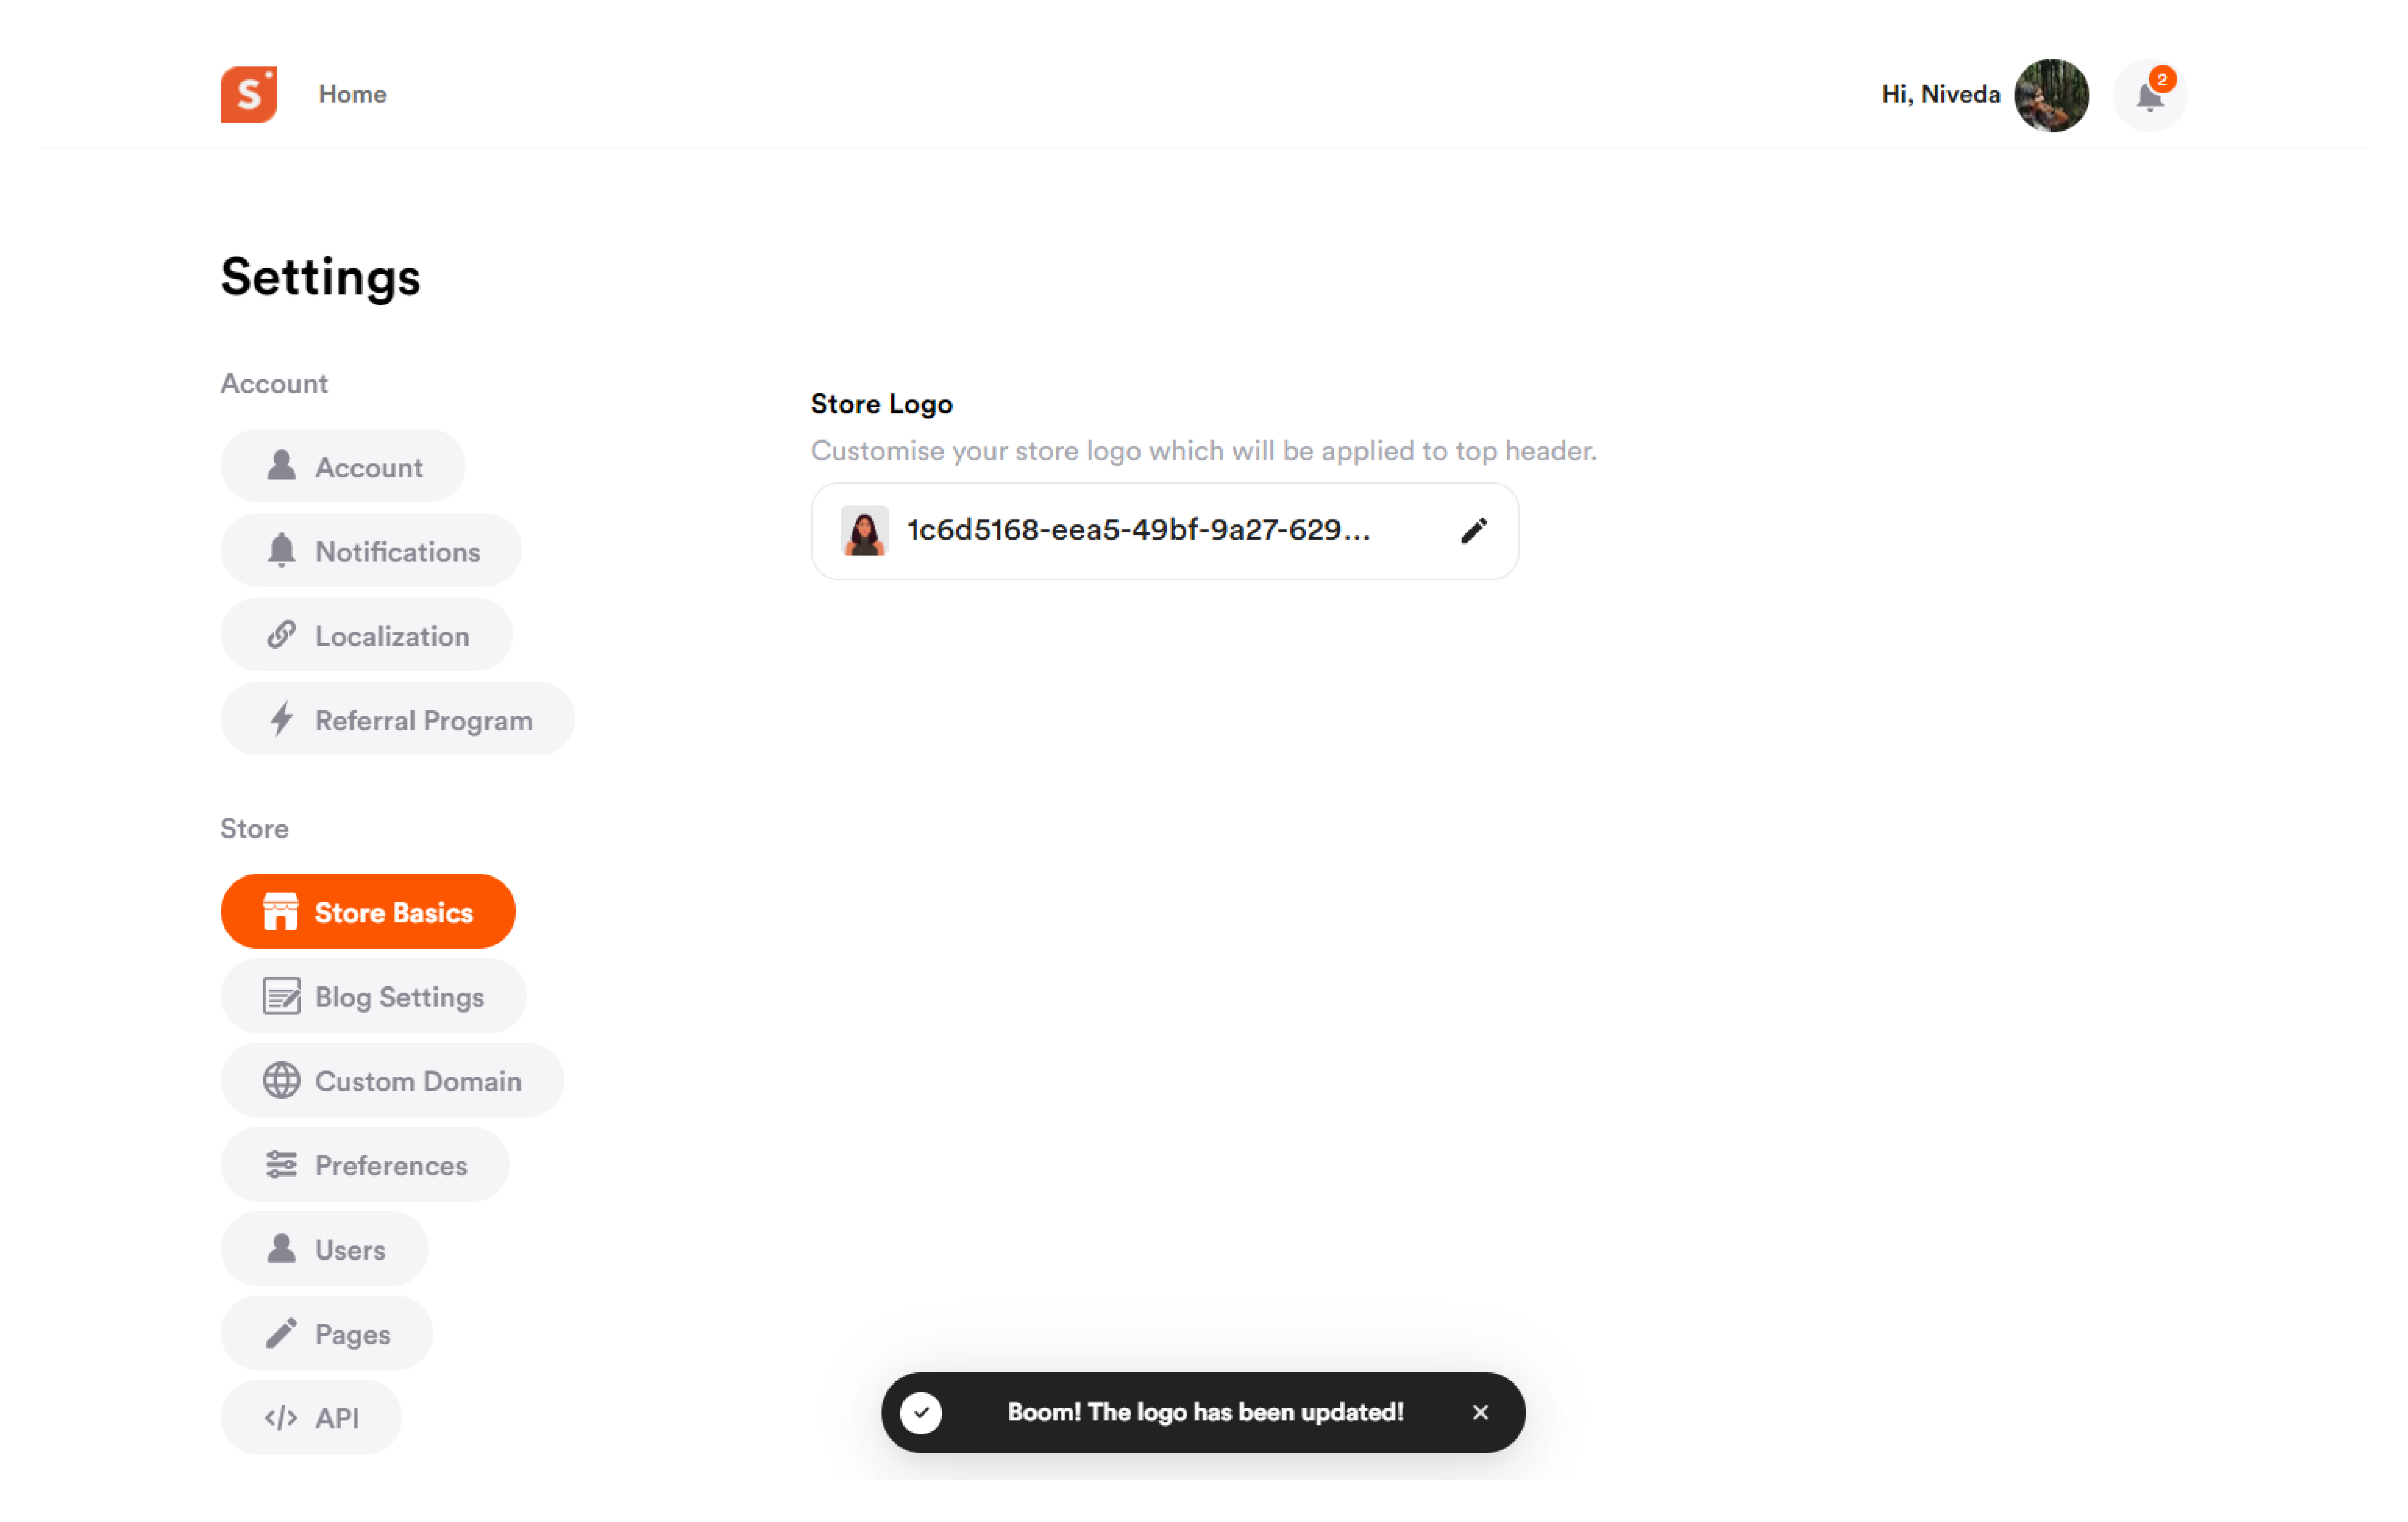
Once you add a store logo, whenever someone visits your profile, they will see your store logo displayed on the top header of your Shopper profile.