The Ultimate Guide on How to Schedule Instagram Reels
Want to schedule Instagram reels ahead of time, but not sure how. Here are three easy ways to schedule Instagram reels and consistently post on your Instagram account.

Today, Instagram reels are much used feature that creators can grow their Instagram account just by posting reels regularly!
The combination of consistency and Instagram reels is therefore the key to success for creators.
In spite of the fact that Instagram reels cannot be scheduled by default, there are several ways to maintain consistency and schedule Instagram reels in advance.
Is It Possible to Schedule Instagram Reels in Advance?
For those who are not full-time creators on Instagram, it can be a challenge to find time to post new Instagram reels consistently.
Creating a reel requires you to edit the video, sync music and add filters, and all this can be time consuming which prevents creators from maximising the full potential of organic reach Instagram reels generate.
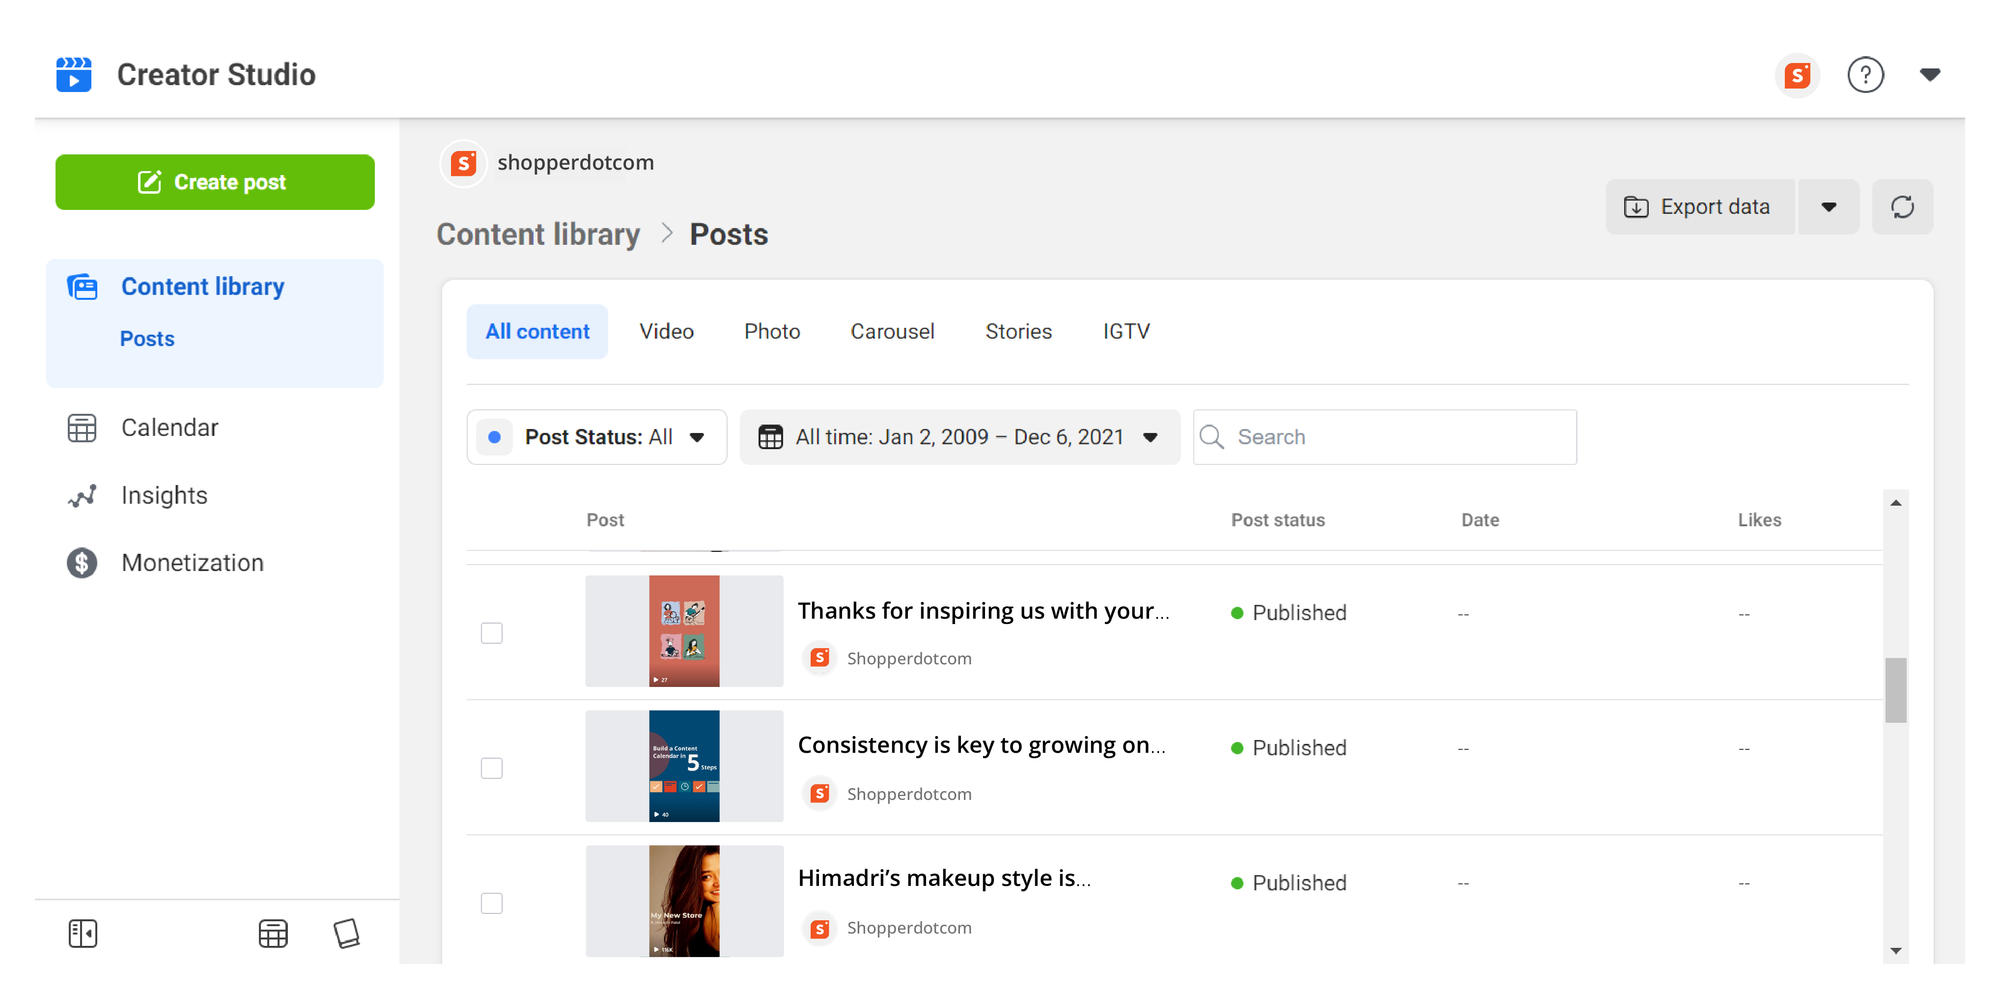
However, with the introduction of Instagram Creator Studio (also known as Facebook Creator Studio), creators now have access to more tools.
Among the host of things you can do with the Creator Studio, there is even a dedicated scheduler that lets you schedule a post in advance.
There are also multiple third-party schedulers that do the same and let you schedule all kinds of social media posts ahead of time to make sure you maintain consistency.
Let's take a look at some of these different ways to schedule a reel.
What are the Different Ways to Schedule Instagram Reels?
There are many ways to schedule an Instagram Reel in advance.
The most straightforward, and probably the safest approach would be to use the Creator Studio for Facebook and Instagram.
However, if you are someone who does not have a Facebook page connected to your Instagram account, you will need to create a page, and connect the page to your Instagram account before you can use the Creator Studio.
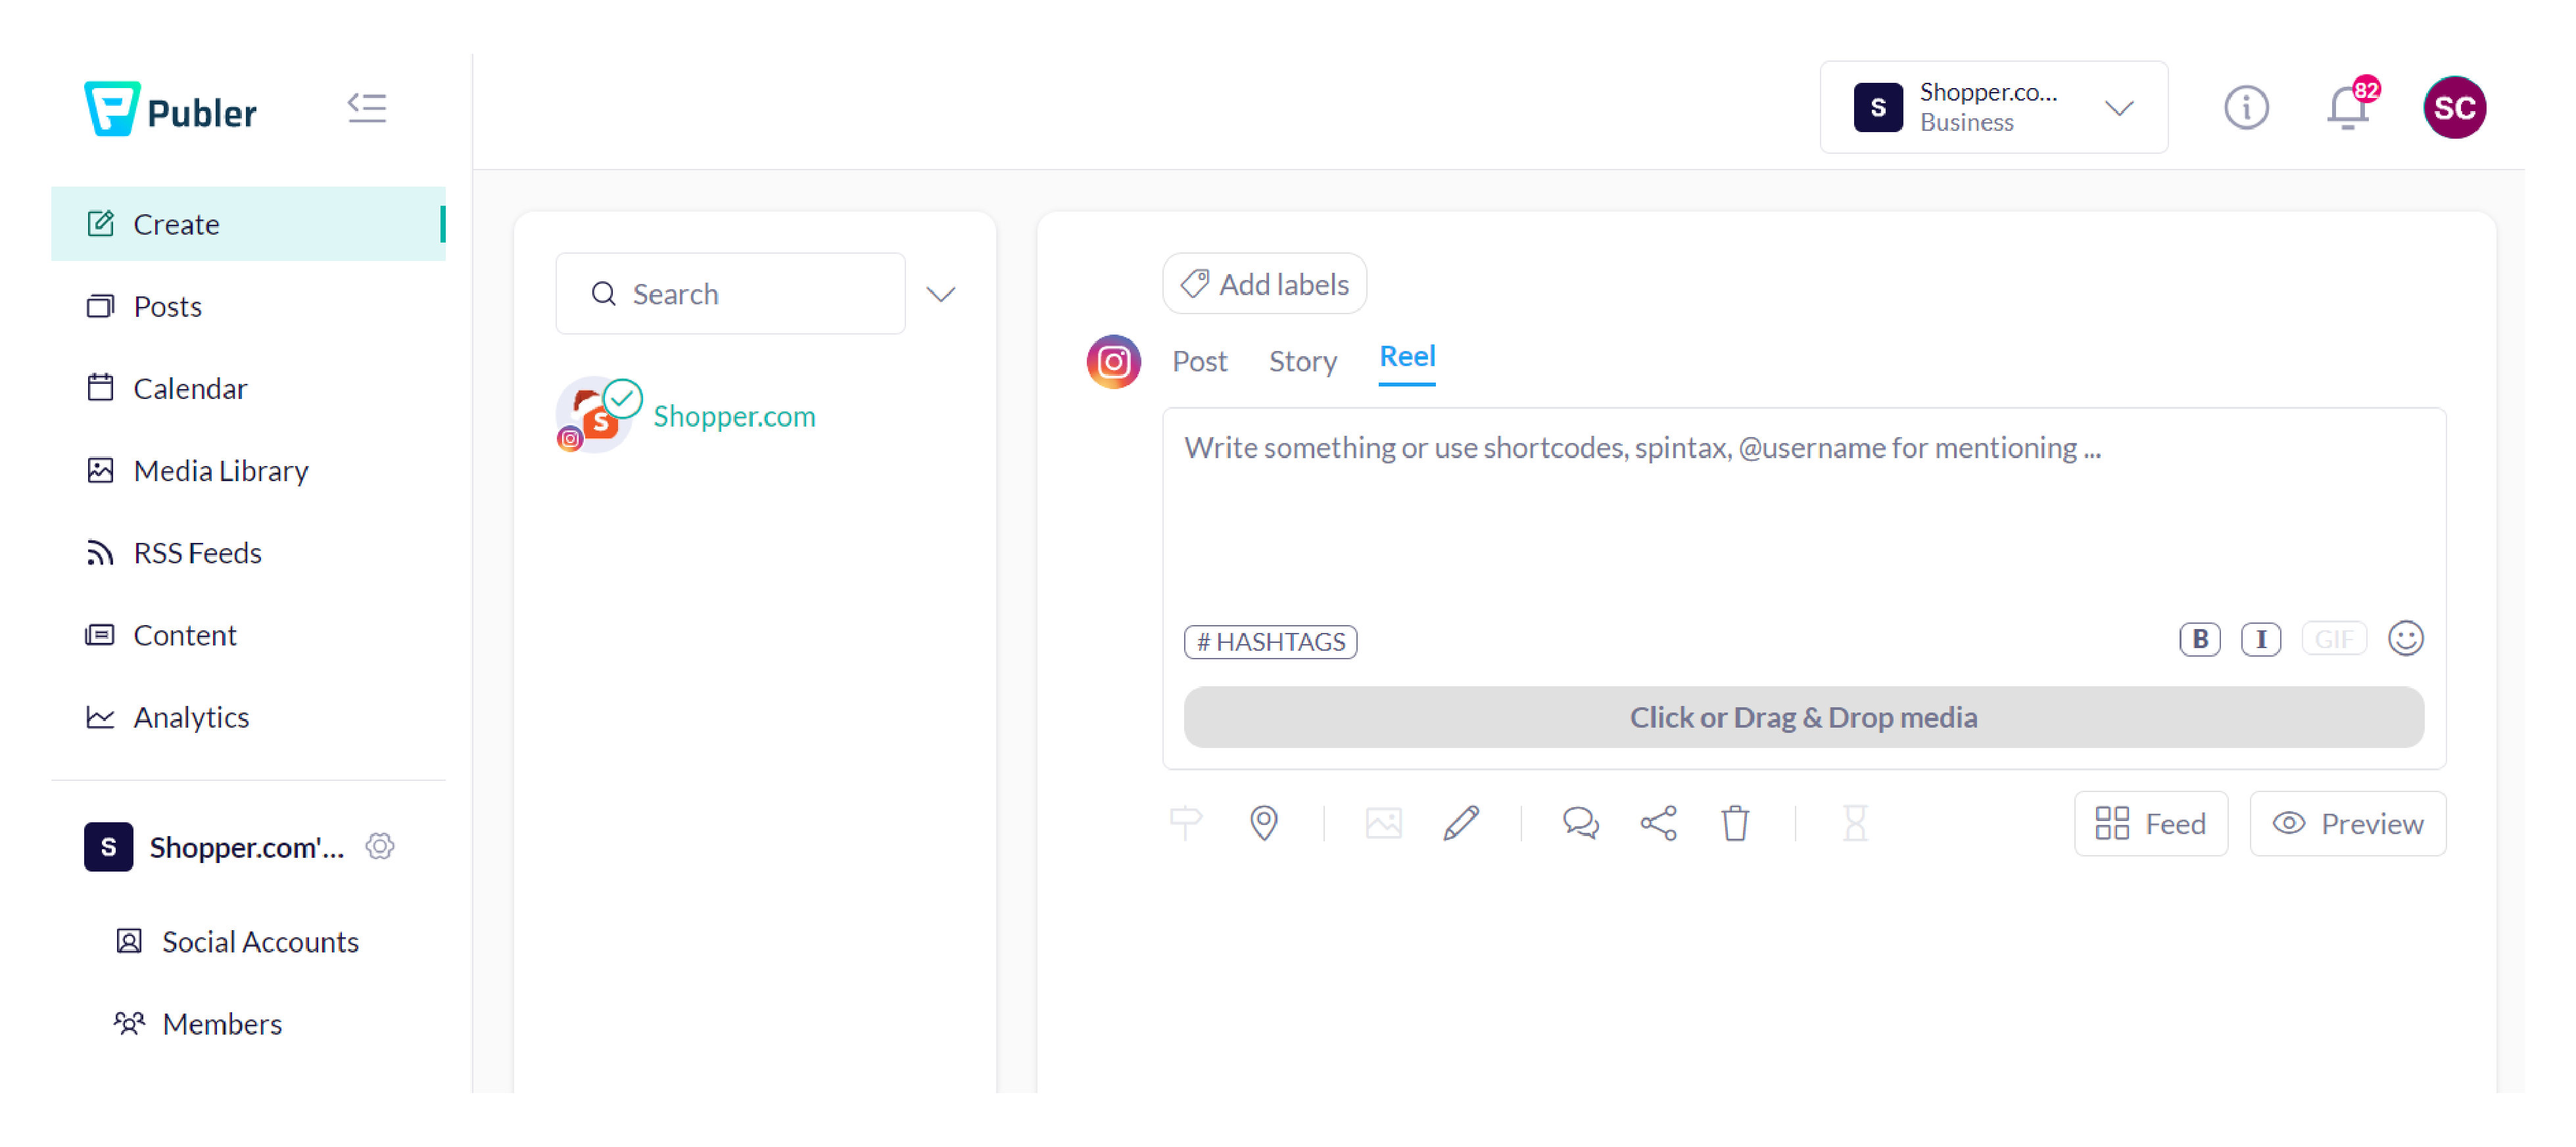
If you don’t want to go through the hassle of creating a new page and connecting it to Instagram account, you would be better off going with third-party Instagram scheduling apps like Simplified, Skedsocial, Hootsuite, Later, or similar apps.
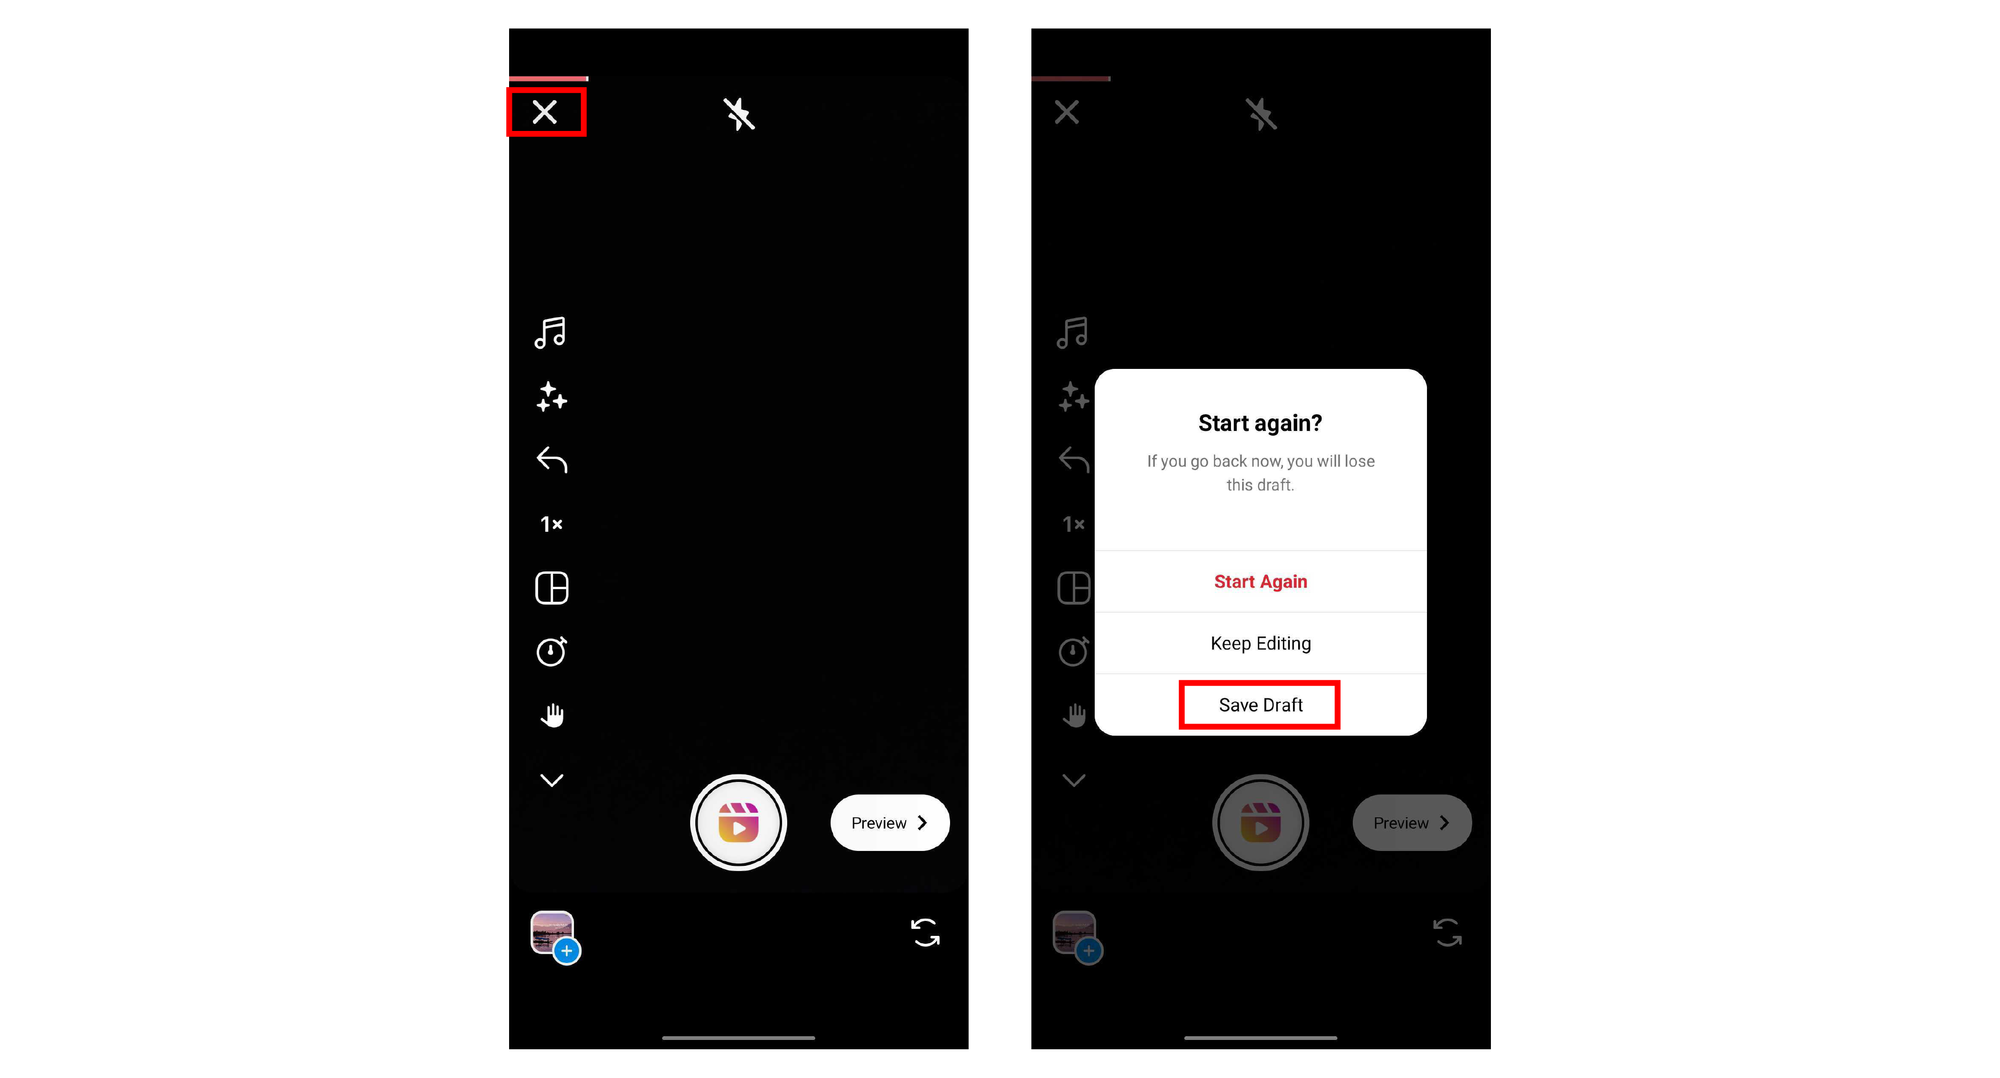
Now the other alternative option you have is to use Instagram drafts as a way to prepare the reel in advance, add details like descriptions and hashtags, and then publish whenever you want to.
Regardless of what way you decide to go forward, we got you covered with a step-by-step guide on all the different ways to schedule Instagram reels.
How to Schedule Instagram Reels with Creator Studio for Instagram?

If you have a Facebook page connected to your Instagram account or are okay with creating one to get access to Creator Studio, you can schedule Instagram Reels with Creator Studio.
It’s also one of the most secure options as you don’t need to give access of your Instagram account to any third-party integration.
For those who do not have access to the Creator Studio for Instagram, and Facebook, you will need to set up a Facebook page, and connect it to your Instagram account first.
In order to do that, you will need to follow these steps:
- If you have a regular account on Instagram, convert it to a creator or business account.
- Head over to Facebook Creator Studio and click on the Instagram icon next to Facebook.
- If you don’t have a Facebook page, you will need to click on Connect to Instagram.
- Follow the instructions that appear afterward to log in to your Instagram account.
If you already have a page that’s connected to your Instagram account, you will not see this step, instead, you will be directed to your Instagram account management page.
You can switch between your Facebook page and Instagram page at any given time.
Once that’s done, all that’s left to do is schedule your Instagram reel. In order to do that, simply follow these steps:
- Log in to your Creator Studio account.
- On your Creator Studio home, click on the “Create Post” option.
- By default, you will be in the Facebook post view.
- Make sure that you change this to Instagram and uncheck the Facebook page
- Next, tap on Video, and select the video file from the desktop, file manager, or video from the image
- Once that’s done, you will need to add the Instagram Reel description, and hashtags.
- When you think that everyone’s in place, scroll down until you come across the ‘Publish’, ‘Schedule’, and ‘Save as Draft’ buttons.
- Tap on the ‘Schedule’ option, and select the date and time that you wish to post.
- Click on ‘Schedule’ once you are done to schedule the post.
How to Schedule Instagram Reels With a Third-Party Scheduling App

If you don’t have a Facebook page or don’t want to go through the hassle of connecting an Instagram account to your Facebook page, you can follow this method.
Contrary to how scheduling Instagram reels work with the Creator Studio, this is more of a plug-and-play method and only requires you to complete a few steps.
On most apps and websites that allow you to schedule an Instagram Reel, you will be required to give authorization for Instagram to integrate with the app.
Once that’s done, you can add the video or images you wish to add as an Instagram Reel.
Depending on the app or scheduling tool that you are using, there will be minor changes from the steps we cover. However, you can expect most of the scheduling tools to follow this format:
- Click on the create icon and select the file that you wish to upload.
- Next, choose the Instagram account you want to schedule the post for (multiple accounts)
- There will be an option to choose the format of your upload - image or reel.
- Choose Instagram Reel, and proceed to add a caption, hashtags, cover image, location, and tags.
- Preview your reel to see if everything is in place.
- Select the schedule, set the time, and date, and confirm the post-scheduling within the app.
How to Set Up an Instagram Reel in Advance Within Instagram

Even though the Creator Studio for Facebook and Instagram has enabled creators to schedule an Instagram Reel ahead of time, there was an alternative long back itself!
That is the drafts feature on Instagram.
You can always add your Instagram Reel as a draft ahead of time.
Head over to your editing app, or go to the in-built editor on Instagram to edit your Instagram Reel. Once you are done editing, proceed to post a reel like you normally do:
- Click on the create a new post option or the ‘+’ button from the top right corner.
- Add the video or images you want to include in your Instagram Reel.
- Choose the song, filters, effects and transitions you wish to add to your Instagram Reel
- Proceed to publish the post by adding a description, hashtags, location, topics, and tags.
- Once everything’s added, click on ‘Save to Draft’ instead of ‘Share’ to save the video to drafts.
- You can access the drafts by clicking on the ‘Reels’ tab of your Instagram profile.
- From there click on ‘Share’ to publish your reel anytime.


